
How to Get Started with WingMind AI
Follow this step-by-step tutorial to install, configure, and launch WingMind AI directly inside your WordPress admin dashboard.
Step 1: Download & Install the Plugin
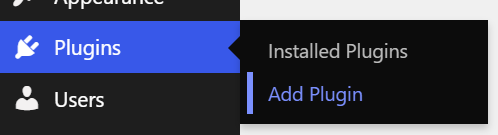
To install WingMind AI on your WordPress site, navigate to Plugins → Add New in your admin dashboard. Click the Upload Plugin button at the top of the page, choose the downloaded plugin zip file, and click Install Now. Once uploaded, click Activate Plugin.
Step 2: Connect Your API Key or Subscription
After activation, connect WingMind AI to an AI model. For quick, effortless setup, choose Subscribe to use managed credits. Alternatively, bring your own key (BYOK): under Settings → WingMind AI, choose Anthropic Claude or Google Gemini as the AI provider and enter that provider’s API key.
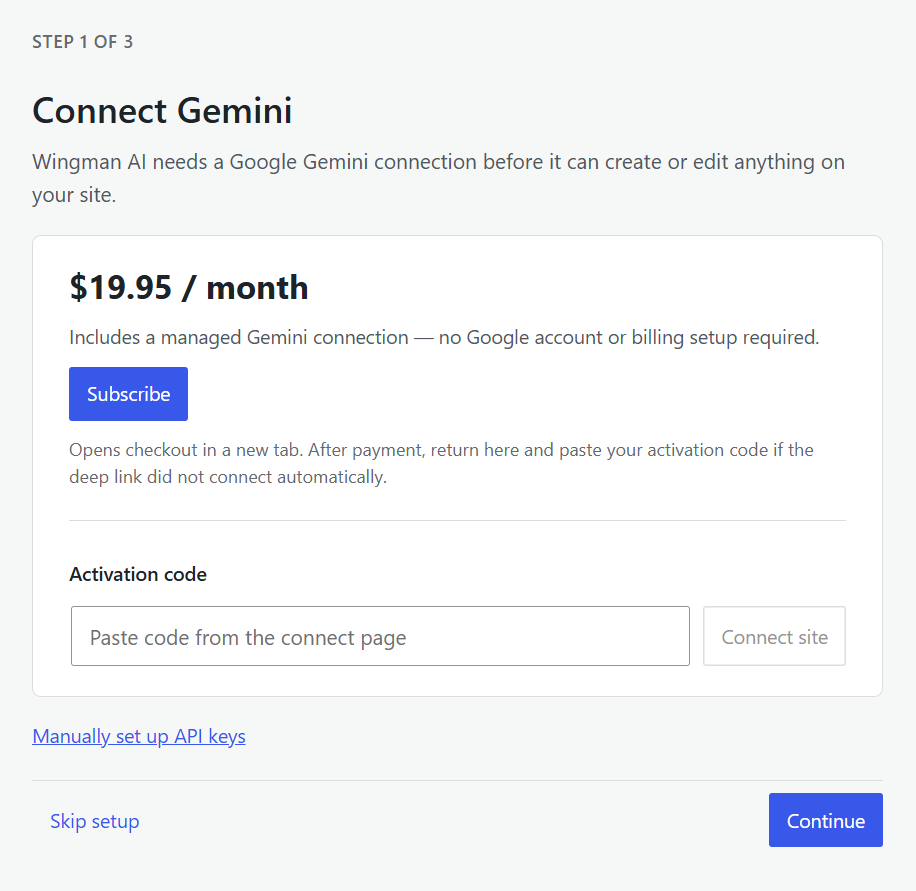
You will then be redirected to a Stripe checkout to activate your subscription. Complete the checkout to proceed.
Next, you should be redirected to a confirmation page with a connection link. Click on “Connect this site” and log in to your WordPress backend.
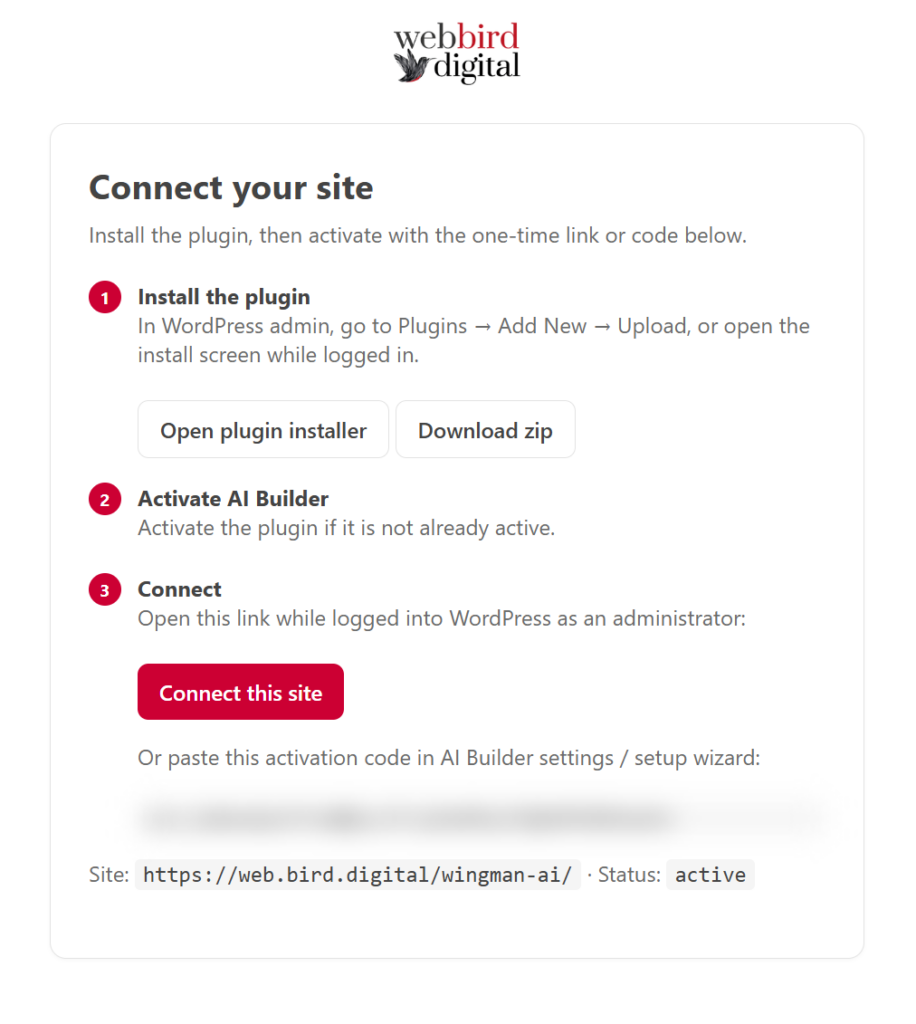
Alternatively, copy & paste the activation code into the box in the previous step.
If you run into any issues with activation, please contact us.
For developers: connect your own agent with the MCP Relay
Prefer to work in Claude Code, Codex, or another MCP client? The MCP Relay lets that agent drive WingMind instead of the built-in AI, so you can skip the API key. One $9.95 AUD / month subscription covers unlimited sites.
- Sign in to the MCP Relay dashboard, subscribe, and create an agent token. Run the command the dashboard shows to add WingMind to Claude Code, or copy the MCP URL and Authorization header into your MCP client.
- In WordPress, go to Users → Profile → WingMind AI and click Connect MCP relay account. Approve the site and confirm on the Connect page. This links only your WordPress user, so other users keep the site’s own AI connection.
- In the WingMind chat, click Connect remote Agent, then prompt your agent. Its tool calls and replies show up in the chat as it works. Disconnect it to use the built-in AI in that chat again.
- Repeat step 2 on each site you manage. Your agent reaches all of them through the same MCP connection.
Step 3: Configure Site Defaults & Context
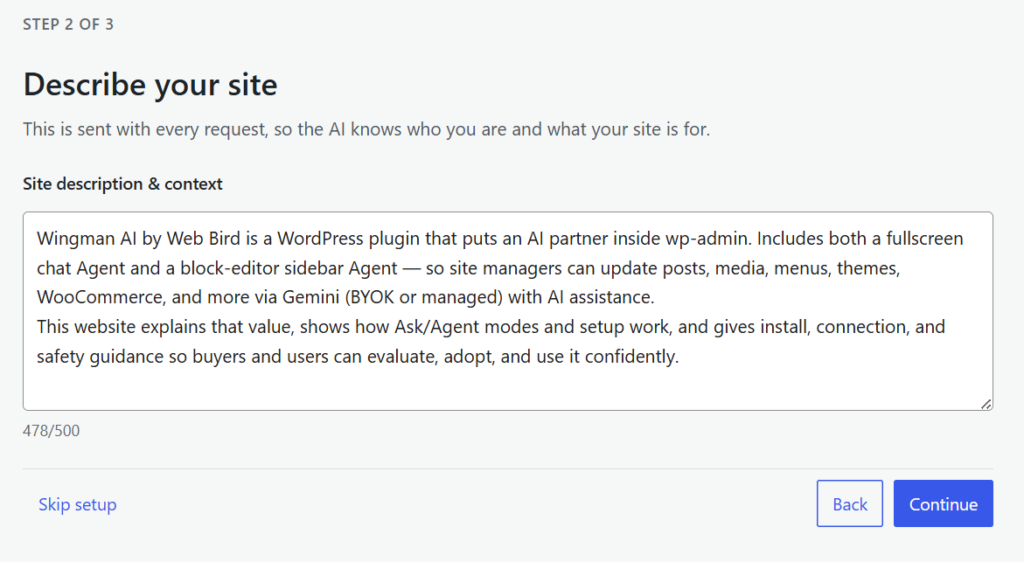
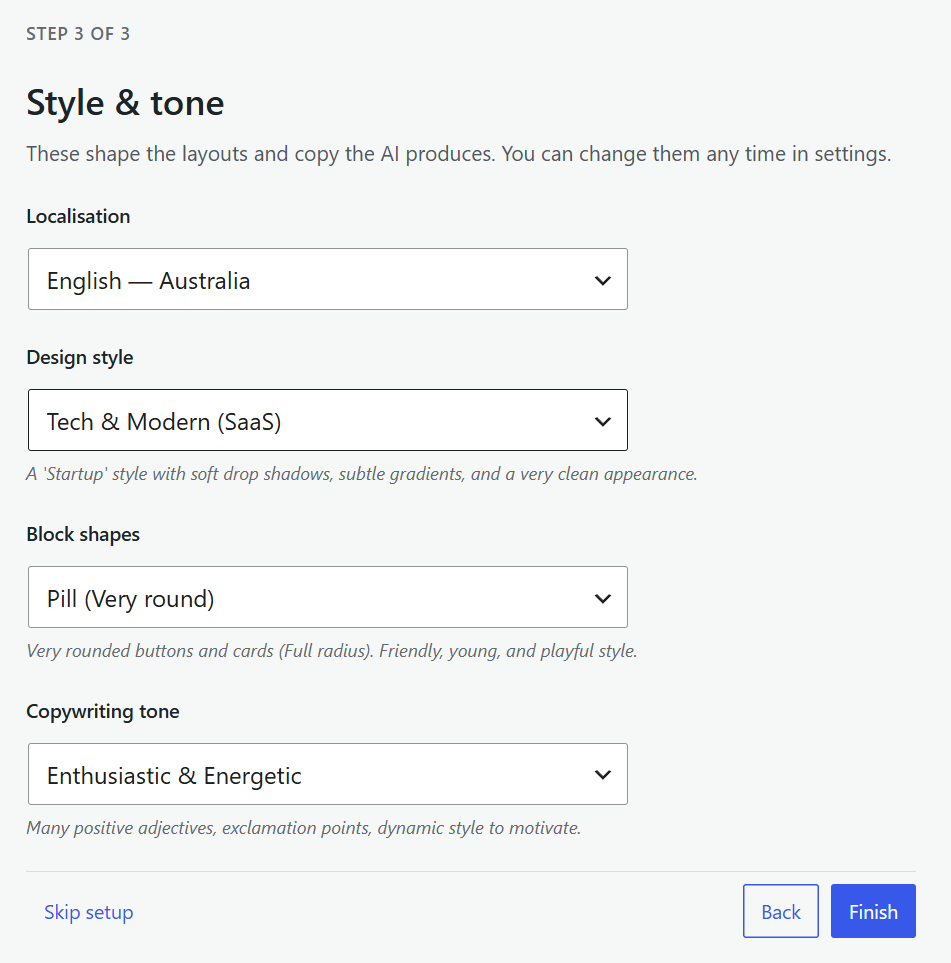
Run the initial setup wizard or navigate to Settings → WingMind AI to set your site profile, brand guidelines, and tone preferences. WingMind AI will automatically generate initial defaults to help kickstart your setup.
Step 4: Launch the AI Agent
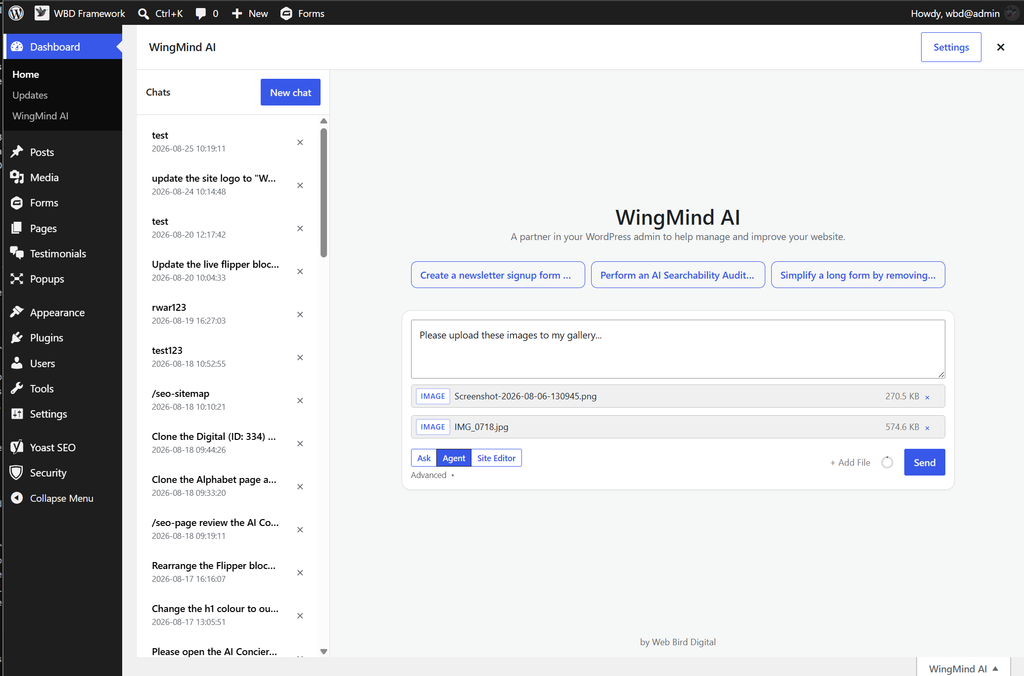
Open the fullscreen chat interface via Dashboard → WingMind AI or click the AI assistant icon in the Block Editor sidebar. Start with a prompt such as: Draft a new version of my homepage with an SEO optimised layout.
Next Steps & Resources
Now that you are up and running, explore our additional guides and documentation pages: