
Step 1
Install the plugin
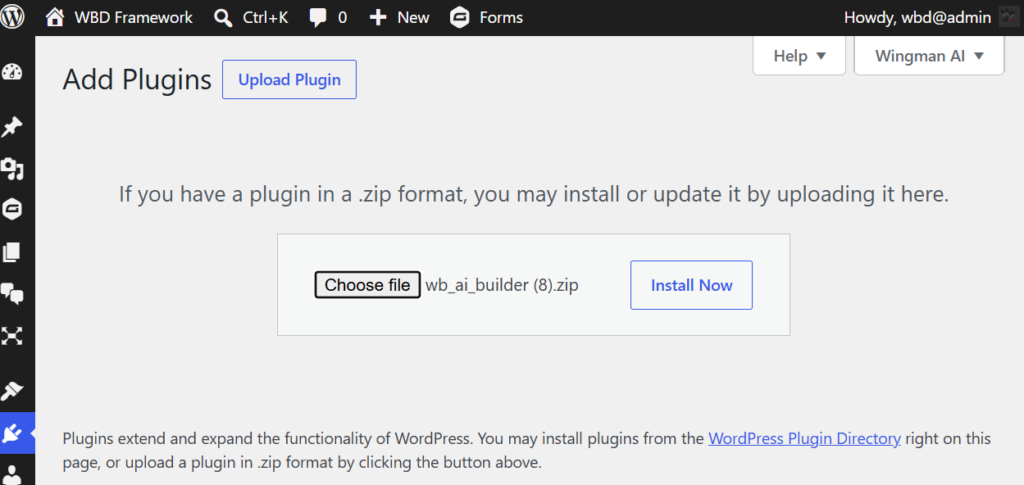
In wp-admin, go to Plugins → Add New, search for WingMind AI and click Install Now, then Activate. Prefer a zip? Download it from WordPress.org and use Upload Plugin.
Step 2
Connect the AI
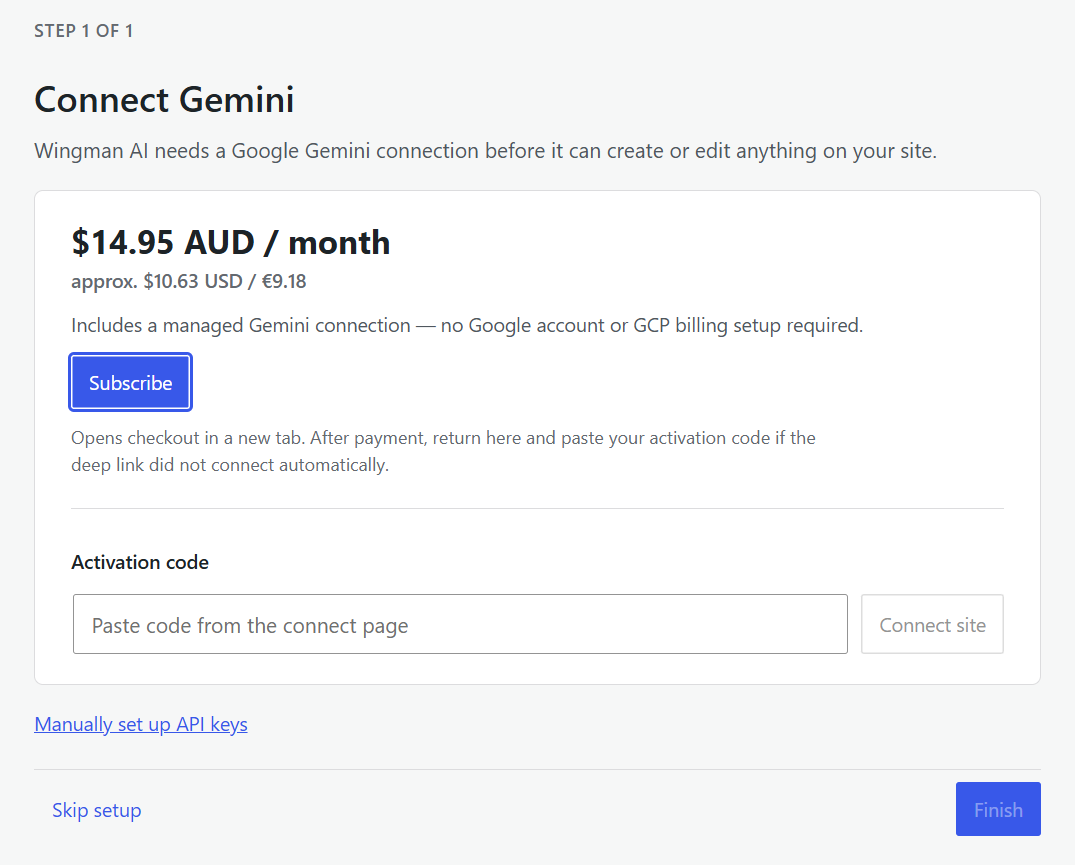
The setup wizard opens when you first launch WingMind. Pick one:
- Managed: click Subscribe, pay through Stripe, then click Connect this site on the confirmation page. Or paste the activation code into the wizard.
- Your own key: choose Manually set up API keys, pick Anthropic Claude or Google Gemini and paste your key. Administrators can also save a personal key under their profile.
- Your own agent: skip the key and follow the MCP Relay setup.
Already subscribed on another site? Add this one from the Manage sites page and share your allowance across up to five sites.
Step 3
Tell it about your site
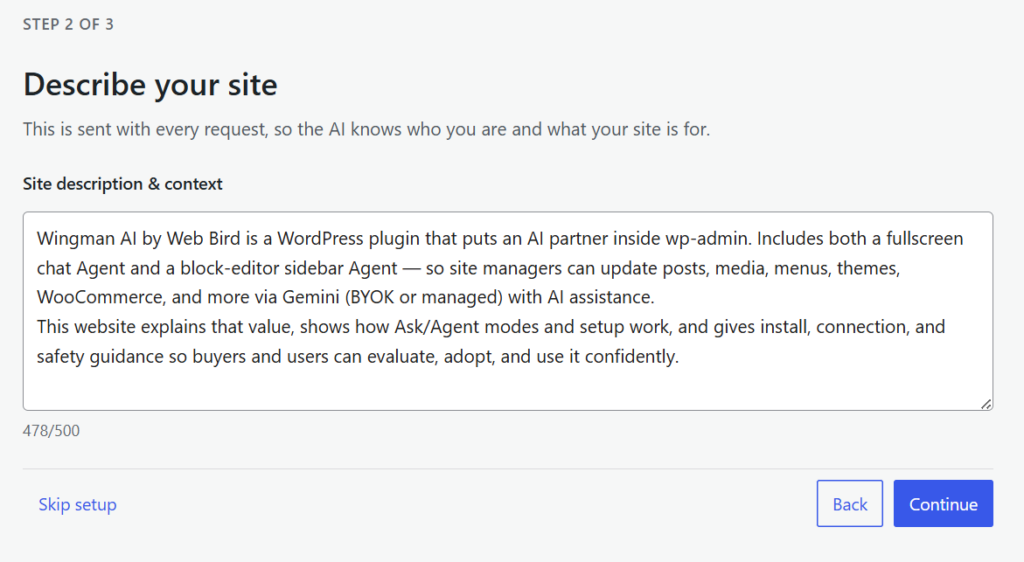
WingMind reads your site and drafts a short description of who you are and what the site is for. Check it, fix anything it got wrong, and continue. This context goes with every request.
Next, choose your spelling and language, design style, block shapes and copywriting tone. You can change all of it, and add your own house rules, under Settings → WingMind AI.
Step 4
Send your first prompt
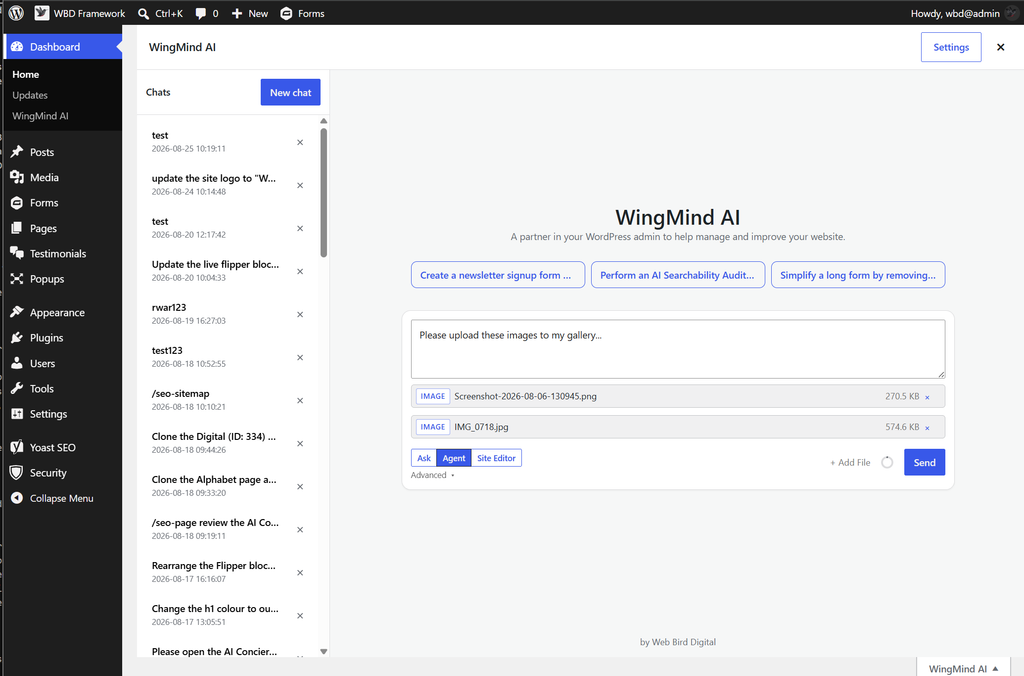
Open Dashboard → WingMind AI or click the WingMind tab at the top right of any admin screen. In the editor, open the WingMind sidebar from the toolbar.
New to it? Start in Ask mode, which can’t change anything, then switch to Agent when you’re ready. Try one of these:
Review my homepage and suggest five improvements.
Draft a new version of my homepage with an SEO-friendly layout.
Where to next?
Agent modes
What Ask, Agent, Site Editor and Plan can each do, and when to use them.
Stuck on activation? Contact our team and we’ll sort it out.